Oh my Goodness! This Sweet Talk Suite is gorgeous and can be used for many “LOVE” occasions. The suite incorporates Sweet Conversations Bundle, Sweet Talk Designer Series Paper, Gingham Embossing Folder, Iridescent Rhinestones Basic Jewels, Real Red Faux Linen Ribbon and Sweet Little Boxes.
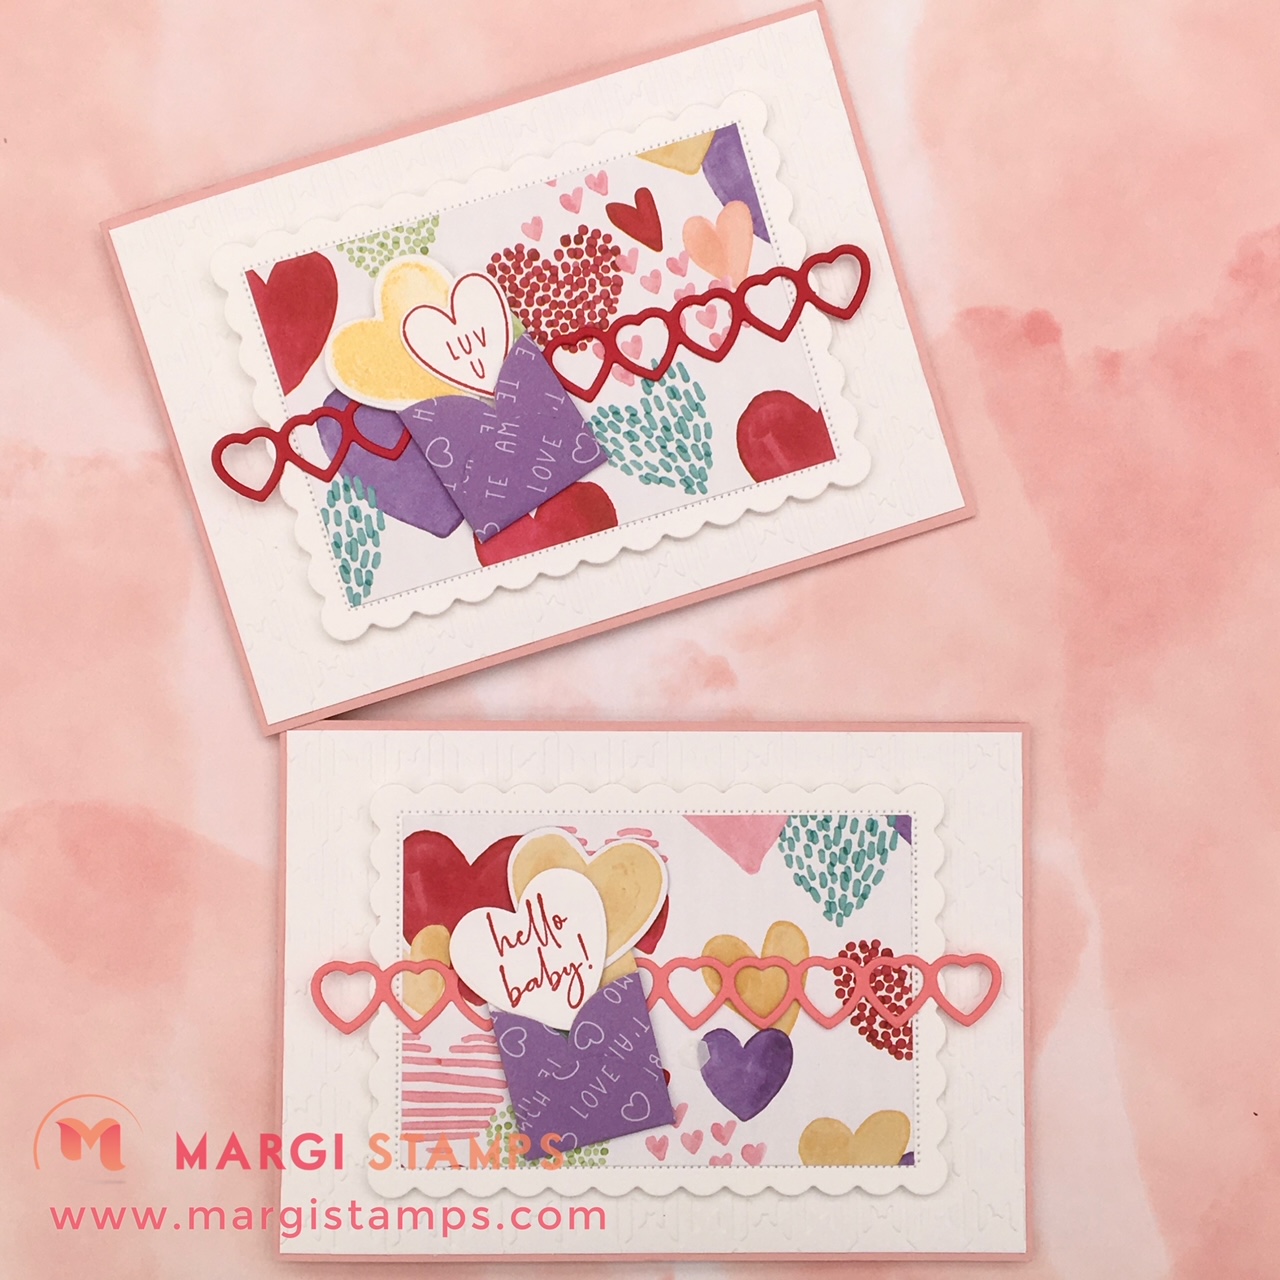
Welcome to your Make it with Margi February Tutorial Card # 3, using many of the Sweet Talk Suite offerings. In our class kit we have the ingredients for two options; one is a Valentines (Anniversary/Wedding/Engagement/BFF etc) card, the other is Welcome Baby. The Valentines option would work for any ‘Love’ themed card.
If you are not in my class groups, you are welcome to enjoy these designs and adapt for your own creativity. You might like to join one of my online or in person class groups and receive your pre-cut card kit. If you live in Australia, you are more than welcome to join my classes or shop with me using my 24/7 Online Store. I would love to hear from you.
Sending Love with Sweet Conversations Card
Ingredients for Sending Love with Sweet Conversations Card
Let’s step through the ingredients used for our card. Most are in the January-June 2022 Mini Catalogue, with the basics from the 2021-2022 Annual Catalogue.
Sweet Conversations Bundle
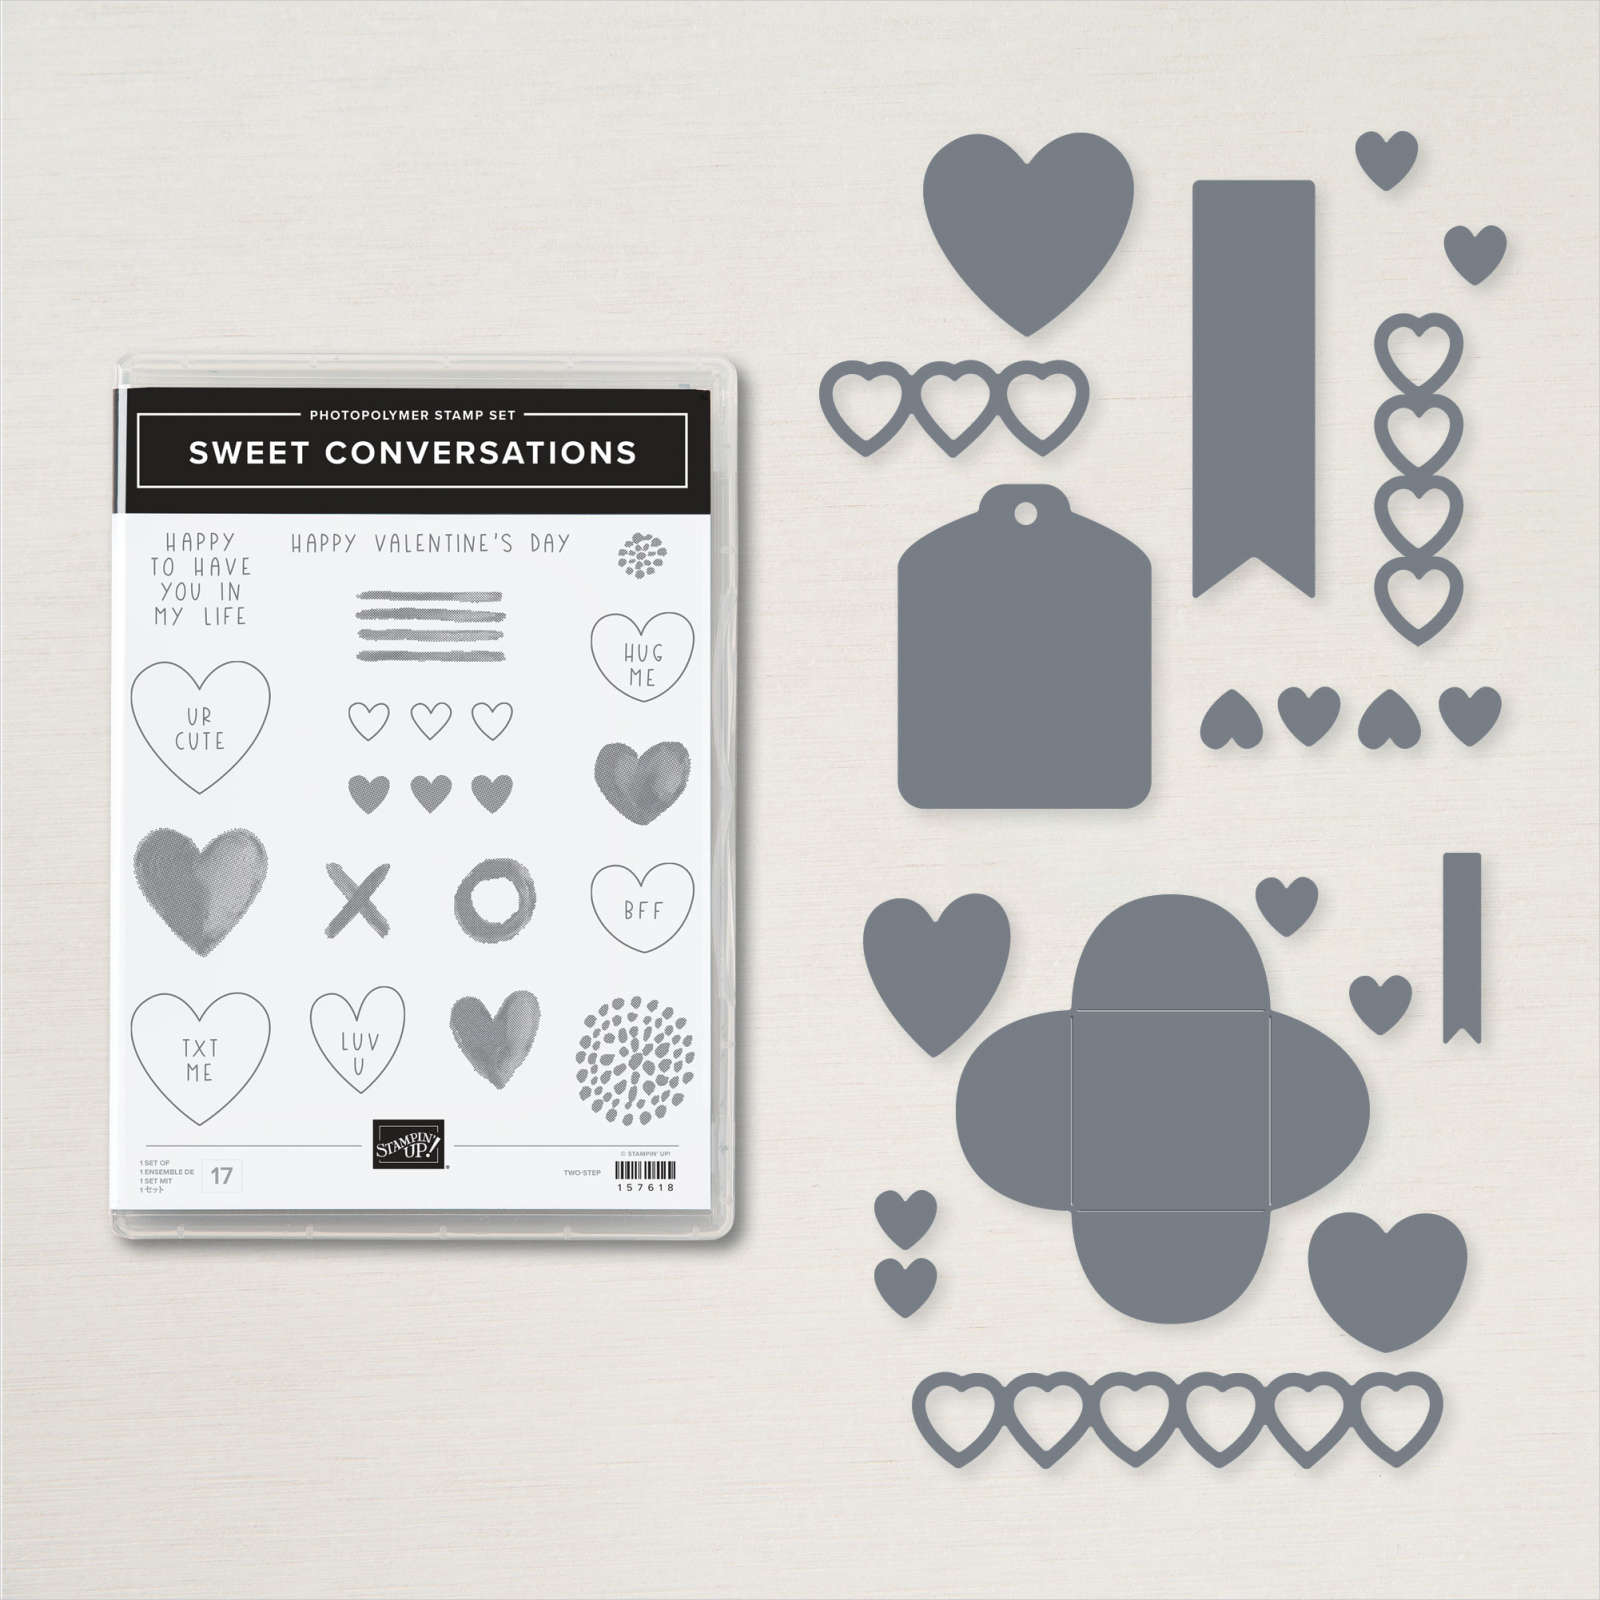
The Sweet Conversations Bundle includes the Sweet Conversations Stamp Set and the Sweet Hearts Dies. The hearts in these products make it so easy to create unique valentines. You can also use them to create love notes throughout the year.
Click HERE for Sweet Conversations Bundle in my 24/7 Online Store
Sweet Talk Designer Series Paper

There are infinite ways to express love, and we wanted to ensure the Sweet Talk 12″ x 12″ (30.5 x 30.5 cm) Designer Series Paper offered a variety of patterns that will allow you to create your own expression. Many of the patterns feature hearts (of course!), but you’ll also find versatile patterns such as stripes and polka dots that can be used any time for any occasion.
And there are lollies! Can you spot them!
Click HERE for Sweet Talk DSP in my 24/7 Online Store
Gingham Embossing Folder
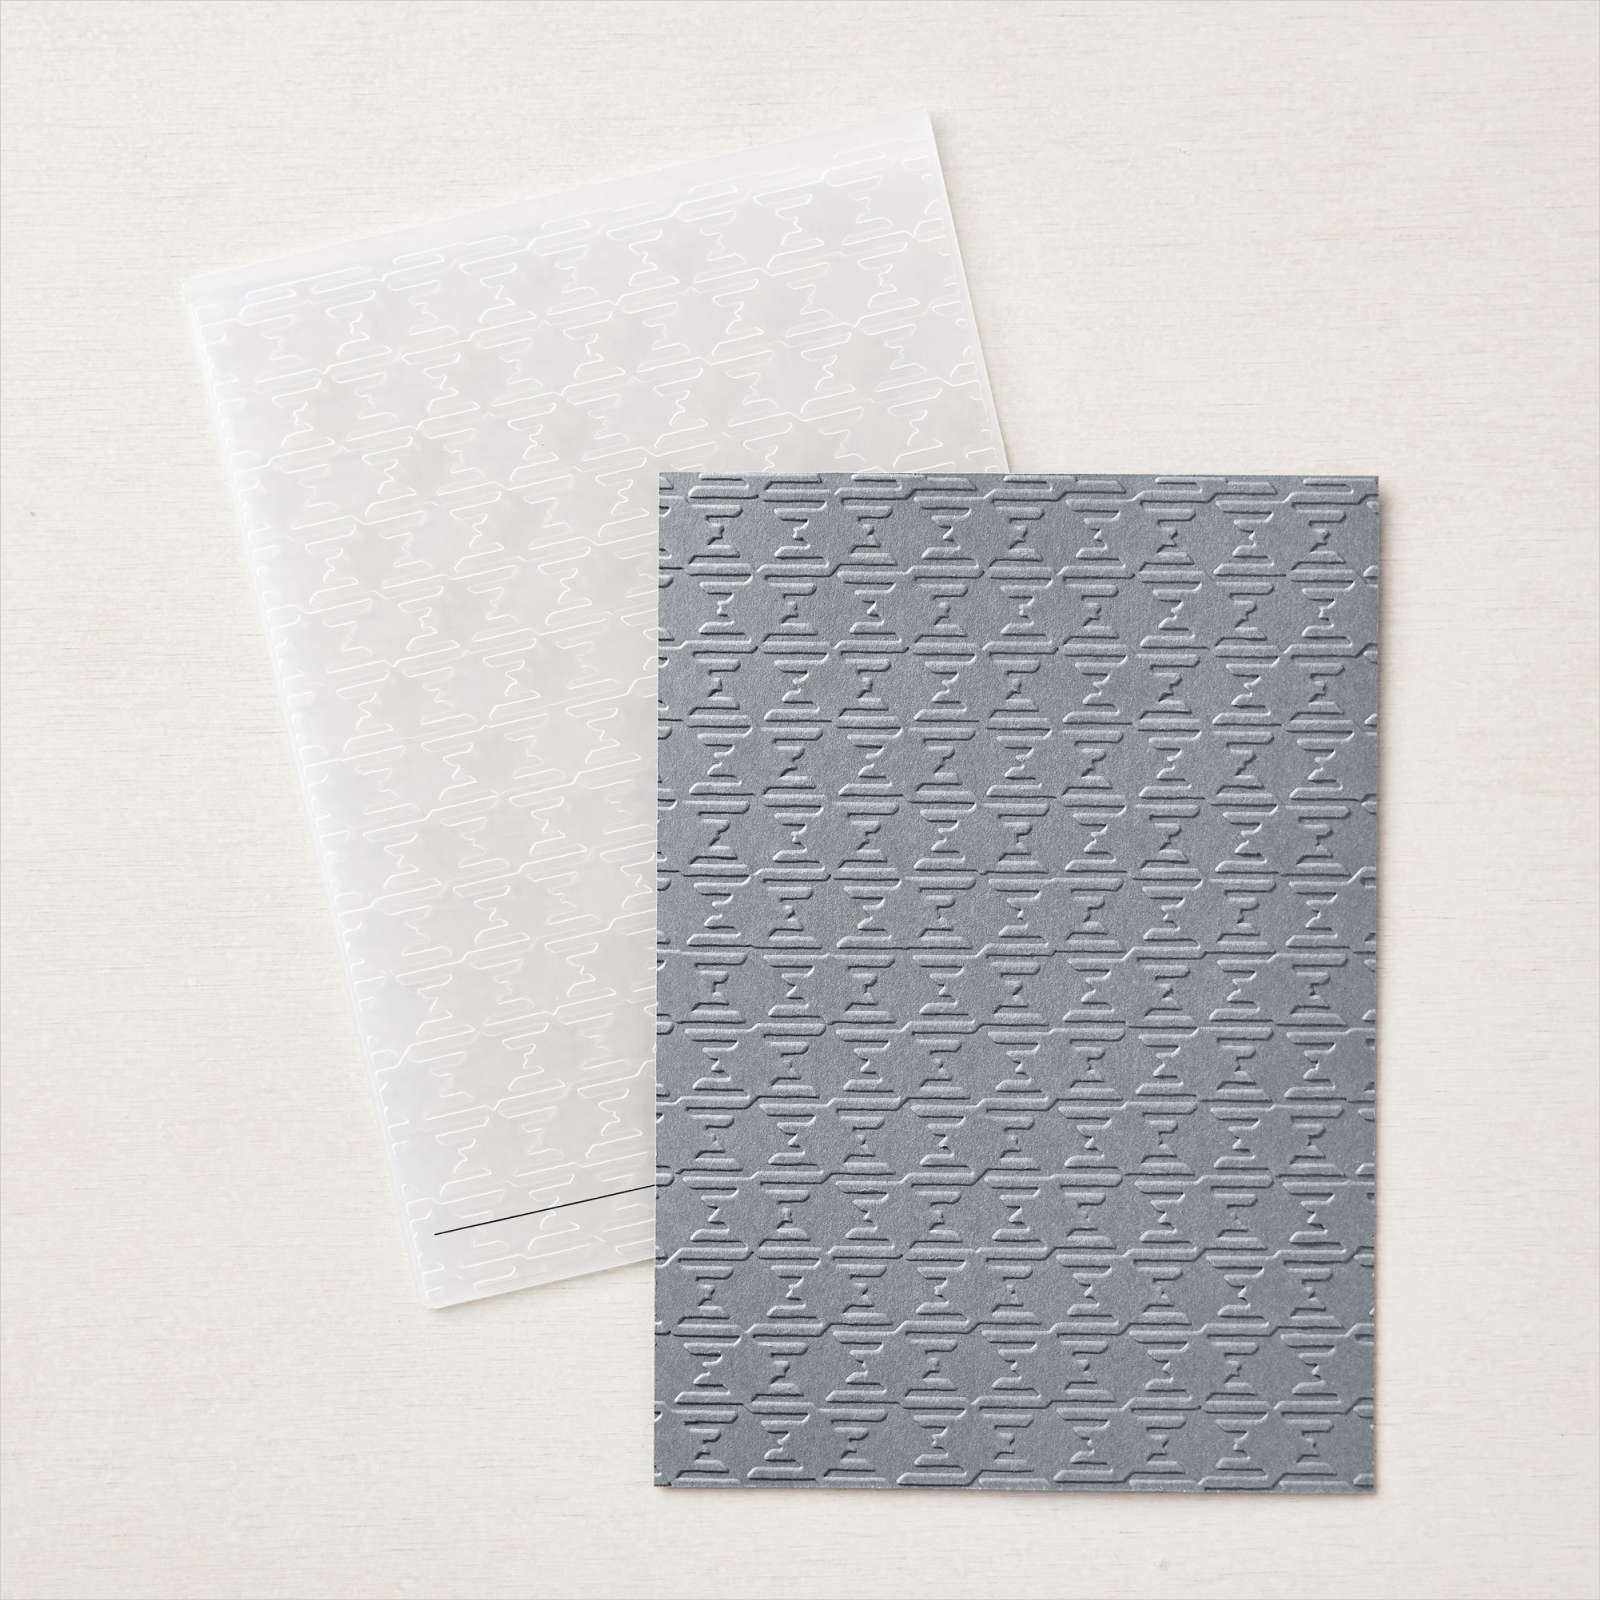
Add dimension to your projects with the Gingham Embossing Folder. This folder features a versatile pattern you can use for all of your paper crafting creations. Use it for a fun layer of texture.
The embossing is crisp and sharp and is a great background for our card design.
Click HERE for Gingham Embossing Folder in my 24/7 Online Store
Scalloped Contours Dies

This set of dies are one of my go-to sets for a quick, easy and effective layer.
Click HERE for Scalloped Contours Dies in my 24/7 Online Store
Happy & Heartfelt Stamp Set

We are using the ‘Hello Baby’ for the “Baby” card option, as the greeting fits perfectly in one of the Sweet Conversations die-cuts. ‘I have you’ would also work with the die.
I love how there are a great variety of greetings in a casual font with this stamp set. It’s in Mini Catalogue.
You can say it all with the Happy & Heartfelt Stamp Set. Need to say congrats? We got you. Want to make a Mother’s Day card? No problem. Trying to say thanks? We got it. Want to say . . . something we haven’t listed yet? You guessed it—this stamp set has that, too. All in an elegant, script-style font you’re sure to love. Use these messages on cards, tags, and other projects.
Click HERE for Happy & Heartfelt Stamp Set in my 24/7 Online Store
All for Baby Stamp Set
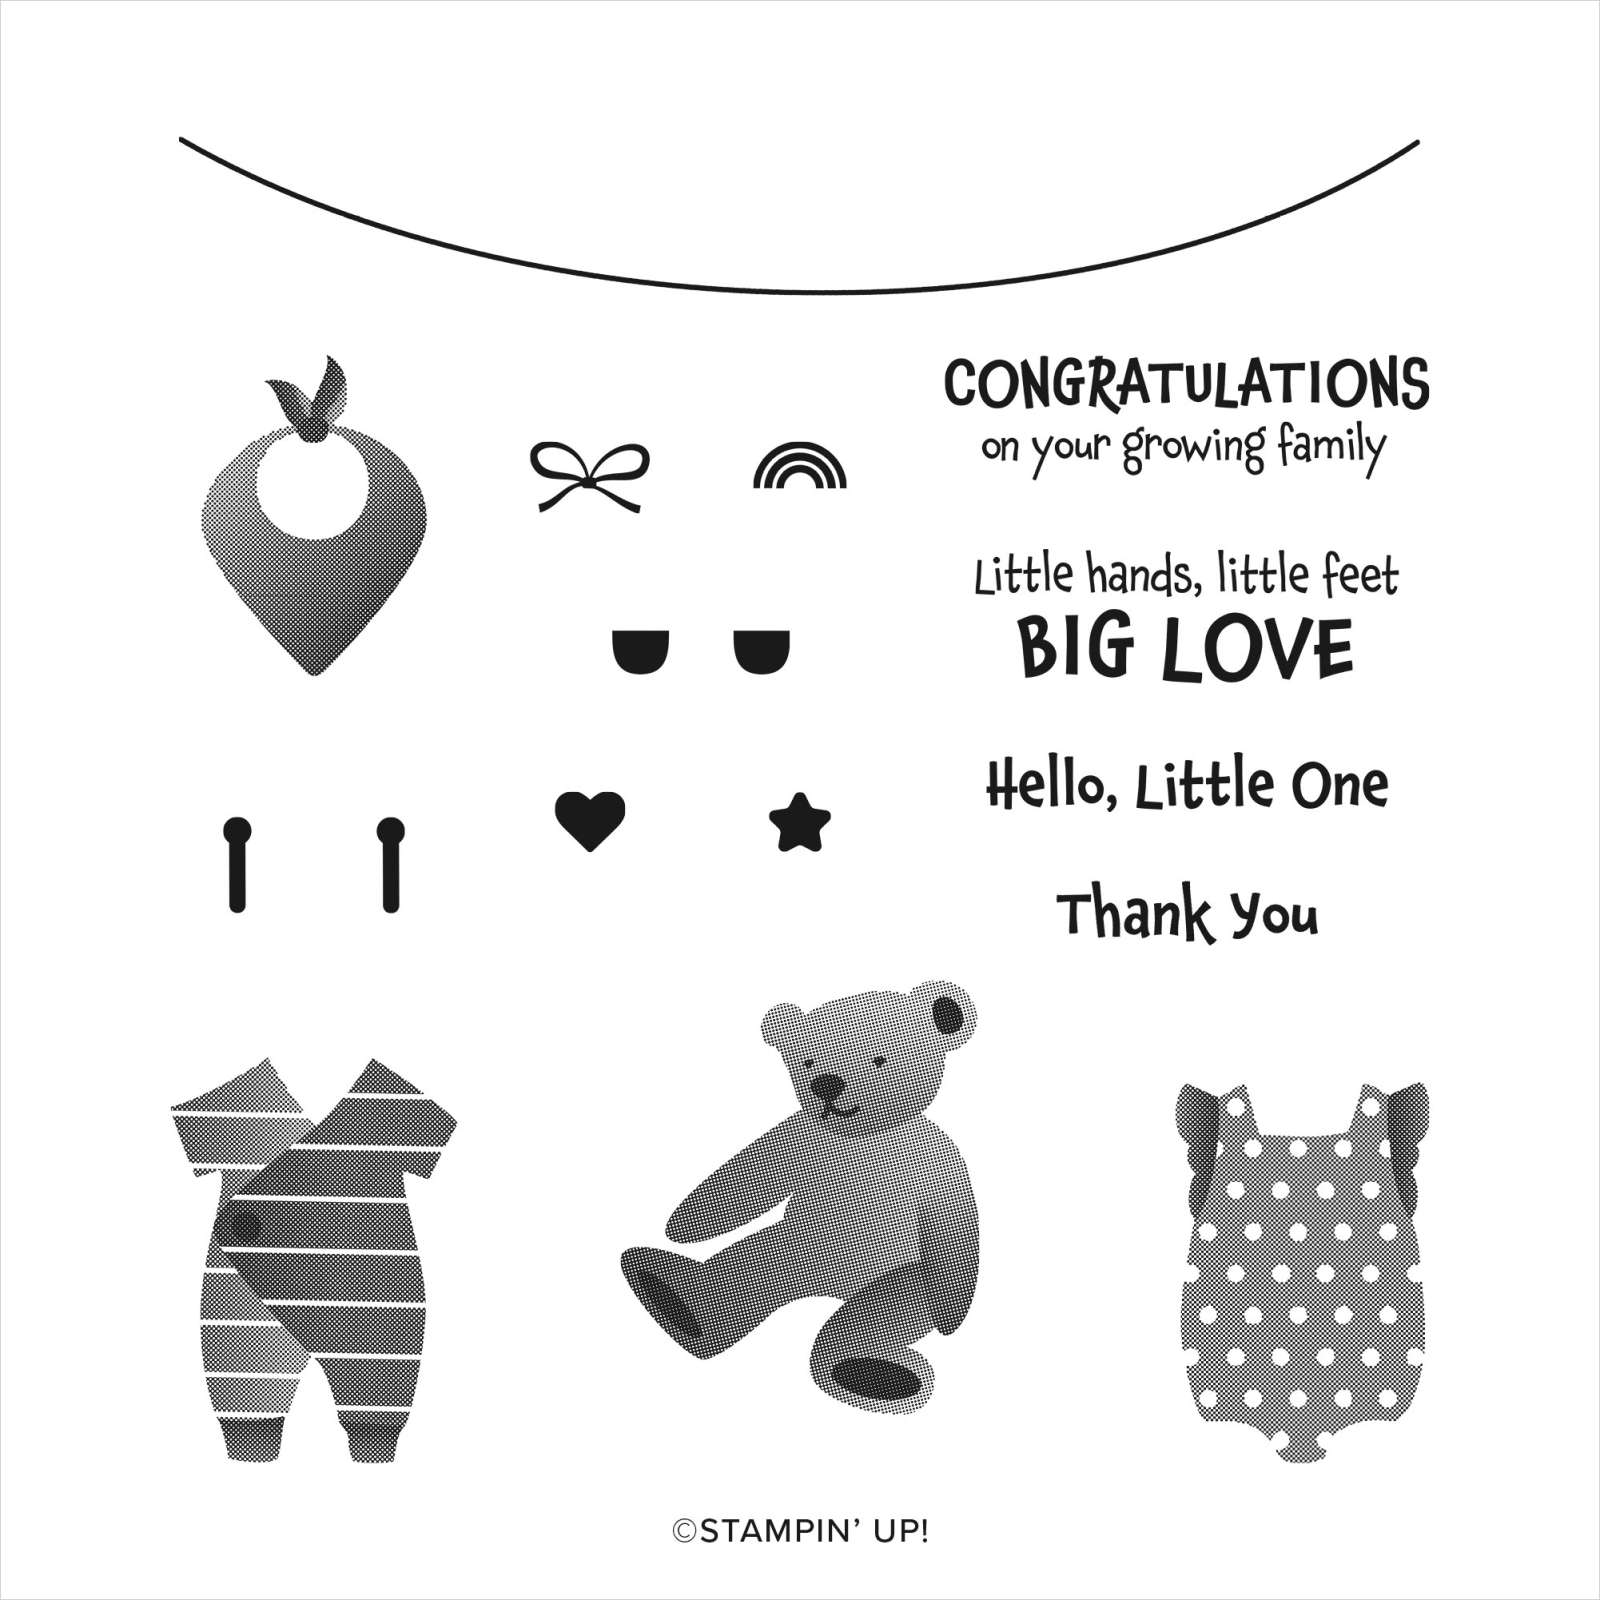
We are using a couple of these stamps to decorate the inside of the card. It’s a very cute stamp set and does have co-ordinating dies.
Be a hit at your next baby shower with this All for Baby Stamp Set. Use these precious images separately, or combine them to create a drying line full of sweet little onesies, rompers, bibs, and more. Adorn your handcrafted cards and gift tags with these fun images and see just how cute laundry can be!
Click HERE for All for Baby Stamp Set in my 24/7 Online Store
Sending Love with Sweet Conversations Card Kit
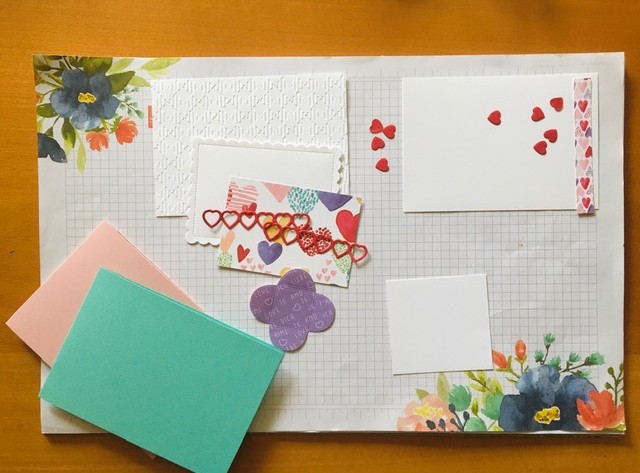
Here is your class kit.
SUPPLIES
- Stamp Sets, Dies & Embossing Folders: Sweet Conversations Bundle, Scalloped Contours Dies, Gingham Embossing Folder, Happy & Heartfelt and All for Baby Stamp Sets
- Papers: Sweet Talk DSP, Blushing Bride, Coastal Cabana or Flirty Flamingo cardstock, Real Red and Basis White cardstock.
- Inks: Real Red, So Saffron, and/or Coastal Cabana, Highland Heather, Flirty Flamingo.
- Other: Multipurpose Liquid Glue, Mini Dimensionals, Mini Glue Dots, Tear & Tape, Take your Pick Tool, Trimmer, Cut & Emboss Machine
HERE is the direct link to all current products in my 24/7 Online Store.
DIMENSIONS
- Card Base: Blushing Bride or Coastal Cabana 29.7 x 10.5 cm scored in half at 14.85 cm (I have done this for you),
- Layering cardstock & DSP: Basic White embossed with Gingham Embossing Folder 14.6 x 10.1 cm, Basic White die-cut with Scalloped Contours die, DSP 10 x 6.8 cm, 2 heart die-cuts in Real Red and hearts. 1 Highland Heather DSP die-cut mini envelope , scrap (7.5 x 7 cm) of Basic White for stamping and die-cutting hearts.
- Inside of Card: Basic White 14.4 x 10 cm, 10 x 1.3 cm strip of hearts DSP.
STEP BY STEP DIRECTIONS

-
- Burnish card base along score line.
- Adhere Gingham Embossed Basic White cardstock to card base.
- Next stamp your heart and greeting. They will both fit on the scrap of Basic White. Stamp chosen greeting in Real Red on scrap of Basic White cardstock, stamp ‘watercoloured’ heart in So Saffron on the same scrap of Basic White. Die-cut both hearts and retain for later.
- Adhere 10 x 6.8 cm piece of DSP to Scalloped Contours die-cut. It fits just inside the stitching!
- Adhere 2 die-cut heart strips (they each have 6 hearts) to the top of the DSP and Scalloped Contour element. They will overlap. Or trim the left hand piece to size.
- Adhere this piece to your card front.
- Make your little envelope.
- Arrange your stamped and die-cut hearts (from step 3) in/around your envelope. I glued mine to the envelope and then adhered all to the card front with Mini Dimensionals.
- For the card insert, adhere strip of DSP to the Basic White piece measuring 14.4 x10 cm.
- Choose your greeting and stamp in Real Red. Choose and stamp any other decoration. Arrange and glue your hearts.
- Adhere this completed piece to the inside of the card.
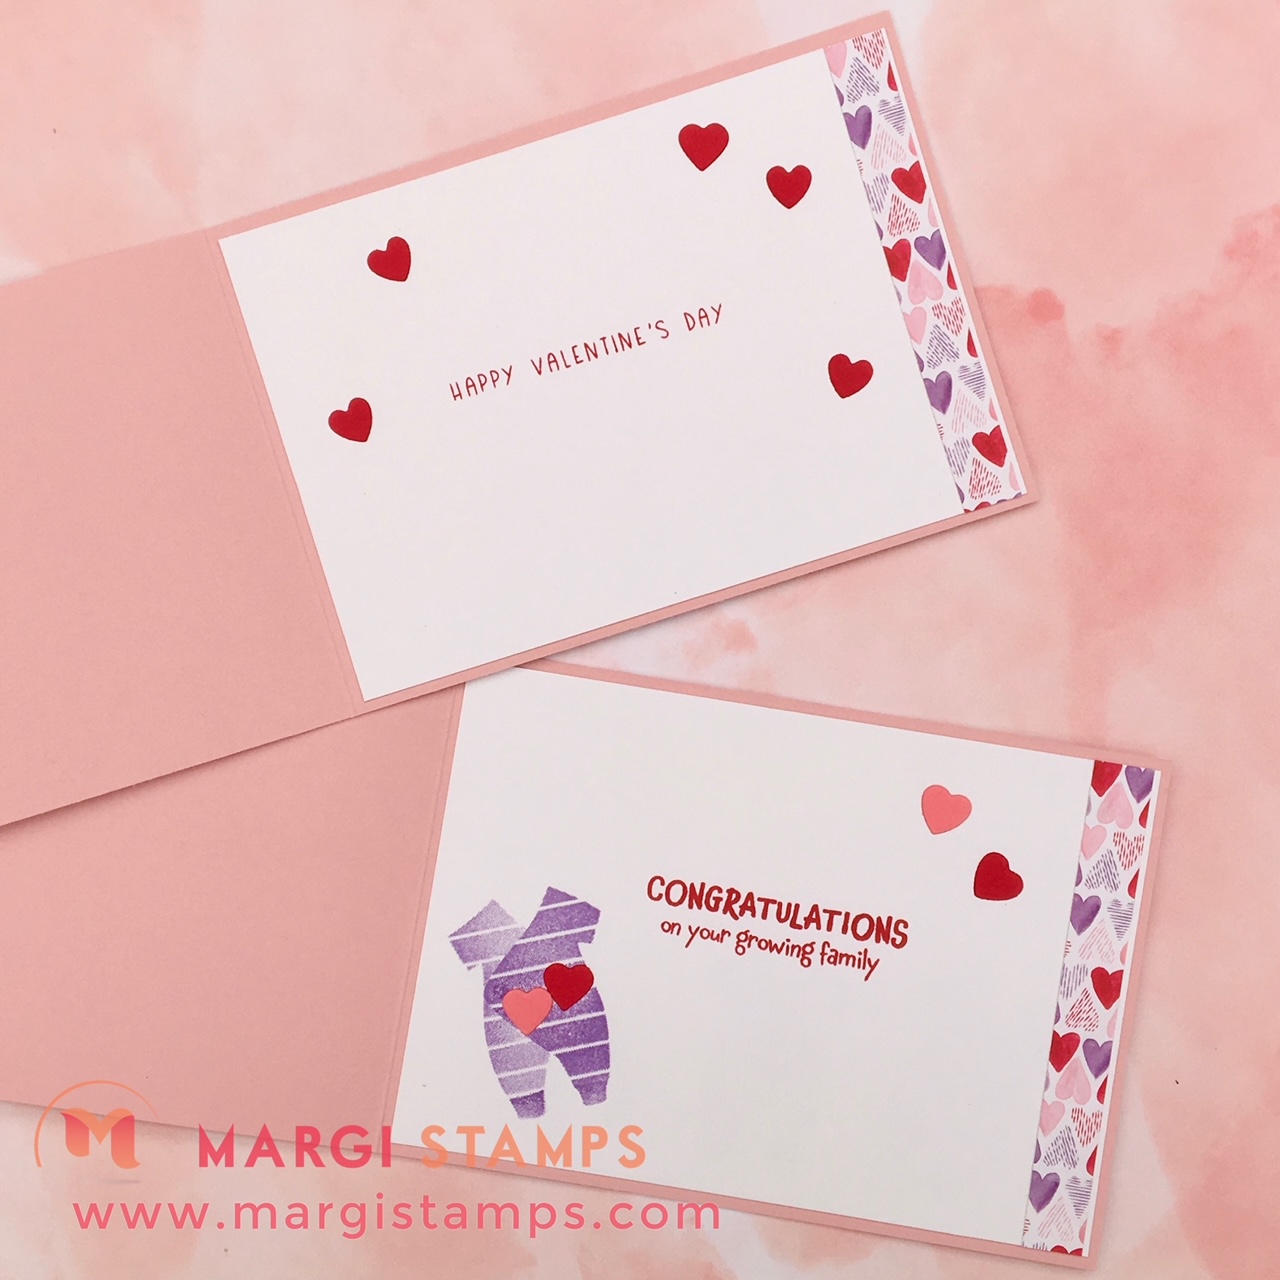
CREATIVE WOW TUTORIAL: HERE IS THE FEBRUARY 2022 SNEAK PEEK
BE INSPIRED BY THESE FABULOUS “LOVE” IDEAS
I have emailed all the Tutorials for the previous months. As the files are quite large, please let me know if you have not received your copy. Please be in touch if you would like to purchase back copies of previous Tutorials or, this current Tutorial.
JOIN MY TEAM – SALE-A-BRATION TREAT:
Join just for yourself to get a discount, and/or build a business, be part of my team and meet friends who love to craft. The choice is yours, and I’m only too happy to chat with you OR, you might like to hop on over to my JOINING PAGE
Here’s a quick look at the offer including the Sale-a-bration treat! (extended to 16 March 2022)
- Choose $235 product for a $169 ($66 for FREE). You’ll also get your choice of any two stamp sets for FREE from our current Catalogues.
- FREE Shipping
- FREE Business Kit, including current catalogues.
- And the opportunity to order from any existing catalogue at 20% discount.
JOIN MY CLASSES:
Please contact me if you would like to join my paper-crafting classes. I run several class groups.
You might like to arrange a private class for you and your friends, or you might like to join my online/virtual class with prepared class kits and PDF/web Tutorials.
Please chat to me about your ideas or queries.
Have Fun Crafting. Enjoy the samples and your own wonderful creativity.
Facebook page is:
https://www.facebook.com/margistamps/
Pinterest site is:
https://www.pinterest.com.au/margisank/
Stampin’ Up! 24/7 Online Store is HERE
My Stampin’ Up! website is HERE
My blog website is:http://www.margistamps.com/
……… till next time, stay safe, have fun!

LOVE IT. LIVE IT. SHARE IT.

